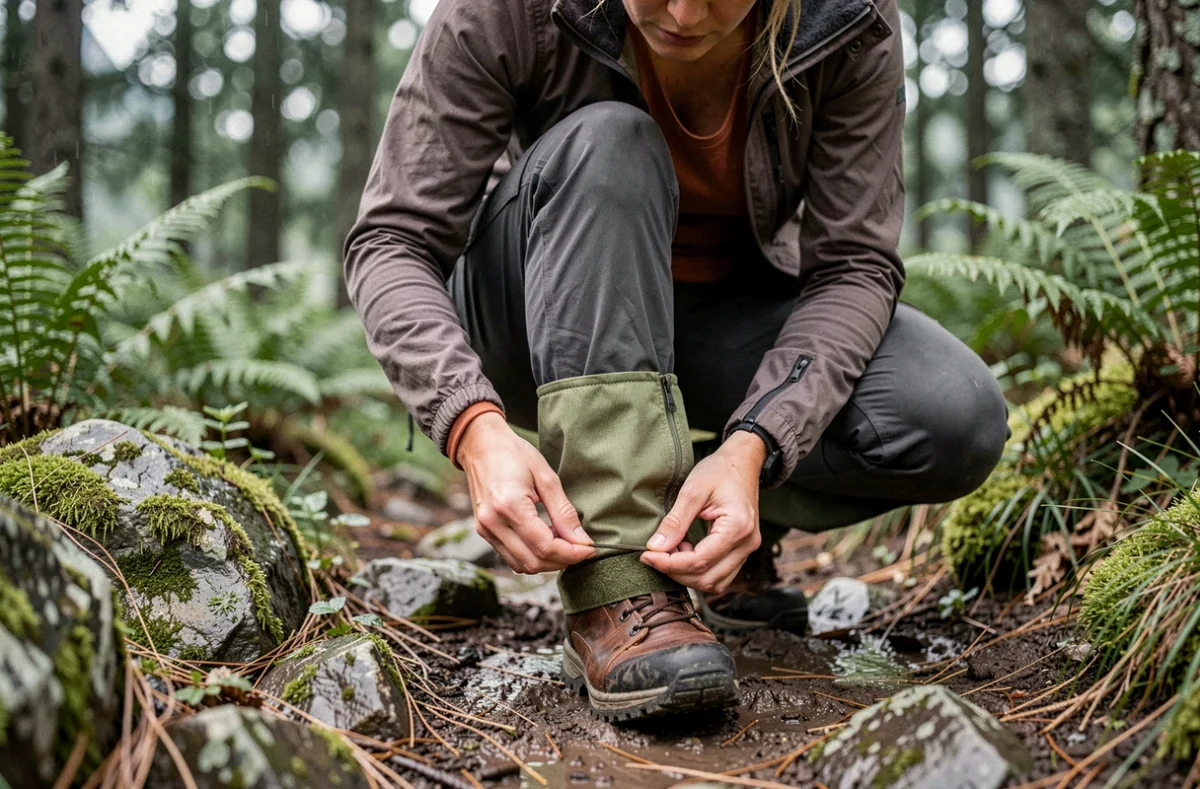
Hiking gaiters protect the opening of your boots from rain, mud and plant debris. However, they don’t make your boots waterproof: water can still seep through the upper or spill over the top during an immersion. This distinction between protecting the ankle-boot junction and waterproofing the entire foot determines how you choose and put on your gaiters.
Trail diagnosis: why are your feet wet despite wearing gaiters?
After crossing waterlogged grass, identifying the source of moisture inside your boot is the first useful step. Three causes are often confused, and each calls for a different solution.
The first is a poorly fitted gaiter. If the strap under the sole has slipped towards the heel or the fabric is twisting around your calf, water can get in through the gap between the gaiter and the boot tongue.
The second cause is water running down your trousers: poorly positioned overtrousers or water-repellent trousers can let water run down to the top of your boot. Gaiters cover this junction, provided their top edge goes over the bottom of your trousers, not the other way around.
The third cause, often underestimated, is sweat. A tall gaiter on a strenuous hike in mild weather traps heat around your calf and foot. The tallest gaiter isn’t automatically the best choice for a warm or dry hike. In this case, your foot is getting wet from the inside, and no external adjustment will change that.
To tell these three sources apart, try a simple test during a break: remove the gaiter and run your hand over the boot tongue. If it’s wet on the outside, water has entered from above. If your sock is damp but the tongue is dry, sweat is the cause.

How to fit gaiters properly over hiking boots
It’s worth trying on your gaiters with your boots before setting off. Sole shape, the position of the lace hook and calf circumference can all significantly affect the fit from one model to another.
To put on boot gaiters securely, follow this sequence:
- Pass the strap under the sole, positioning it between the heel and the arch of your foot. Never place it under the forefoot, where it can restrict flexion and wear out faster from contact with the ground.
- Hook the front hook onto a boot lace or the eyelet provided, then fasten the gaiter from the bottom up (zip, hook-and-loop fastener or snaps, depending on the model).
- Adjust the fit around your calf so the gaiter stays in place without squeezing, then tuck the bottom of your trousers inside the gaiter to stop water running down.
- Take a few uphill steps and flex your ankle: the gaiter shouldn’t twist or cause its strap to slide towards your heel.
Checking the fit while flexing your ankle before setting off can prevent adjustments on the trail. If the gaiter twists, it’s too loose around your calf or the front hook isn’t attached at the right point.
Low or tall gaiters: let the terrain decide
Choosing the right height depends as much on the terrain as on the weather. The difference affects the level of protection, thermal comfort and durability.
Low gaiters for dry, rocky trails
Low gaiters cover the area between the top of your boot and your ankle. They’re enough to keep out gravel, dust and small debris on dry trails. Their main advantage is ventilation: less fabric around your calf means less heat build-up and therefore less sweating.
Tall gaiters for wet grass, snow and dense brush
Models that reach the knee offer better protection in waterlogged grass, snow and dense brush. Water running down your trousers is caught higher up, well away from the opening of your boot. The trade-off is that these gaiters retain more heat. On a strenuous hike in mild conditions, they may cause more internal moisture than they keep out.
Hikers who alternate between forest trails and wet areas may find it useful to bring tall gaiters and take them off on dry sections rather than wearing them throughout the hike.
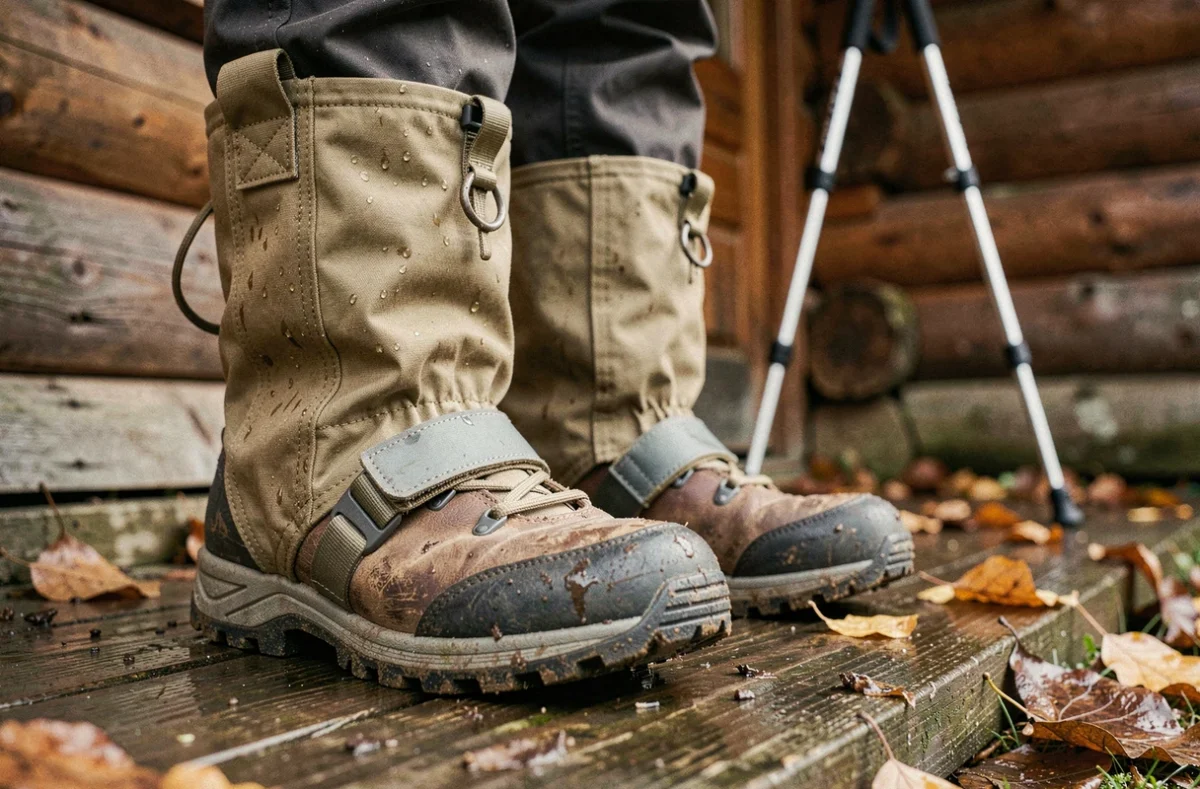
Wear on the underfoot strap: the weak point to inspect
The attachment point underfoot is the most critical wear point on a pair of gaiters. User reviews of mountain models report cord failures on abrasive terrain, particularly on volcanic rock, shale and stony trails. If a strap breaks mid-hike, the gaiter becomes unusable.
Before every demanding hike, take a few seconds to check the condition of the strap. Look for:
- Visible abrasion on the section that contacts the sole, especially around the heel, where friction is greatest.
- The strength of the stitching or attachment point where the strap joins the gaiter body.
- Whether the strap can be replaced: some manufacturers offer replacement straps, while others don’t, which affects the product’s lifespan.
Braided nylon cord resists abrasion better than thin elastic, but it offers less flexibility when walking. Check whether the strap is replaceable before buying to avoid throwing away a perfectly good gaiter because one component has worn out.
Keeping your feet dry while hiking: what gaiters can’t do
Gaiters protect the junction between your boot and trousers. They can’t make up for a failed waterproof membrane in your boot or unsuitable socks that hold moisture against your skin.
On a multi-day trek in wet conditions, gaiters, membrane-lined boots and technical socks work together as a system. If any one of the three fails, the whole system becomes less effective. A boot with a saturated membrane will let water in through the upper, whether or not the gaiter is fitted perfectly.
Re-waterproofing your boots before the season, choosing merino wool or quick-drying synthetic socks, and adjusting your gaiters to suit the terrain are the three steps that, together, genuinely reduce the risk of wet feet on the trail.